1. Getting Started
1.1. Prerequisites
In order to integrate Trusona with Slack, you’ll need the following:
- Slack Plus or Enterprise Grid plan
1.2. Set up configuration
1.2.1. Log into Trusona
Log into your Trusona account at trusona.dashboard.com

1.2.2. Navigate to the generic integration option(s)
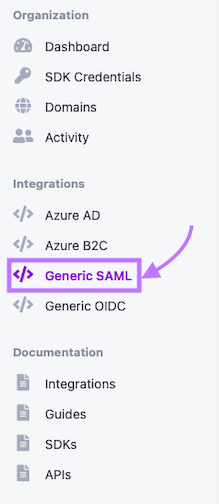
Locate the navigation bar on the left side of the main page, and click on the Generic SAML tab
1.2.3. Creating a new generic integration
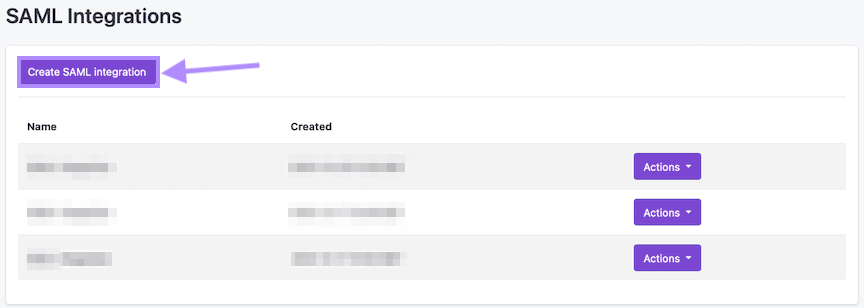
Click on the Create button to begin
1.2.4. Customize & Upload Data
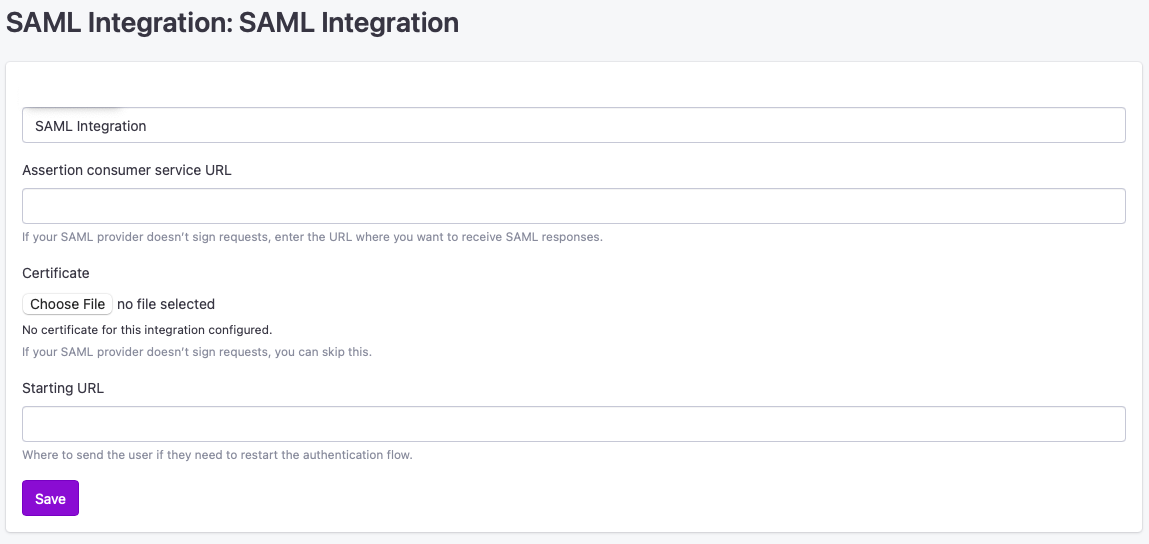
Be sure to fill in all the necessary information requested, and upload any files/documents needed. Failure to do so may prevent Trusona from creating the integration successfully
1.2.5. Additional actions for integrations
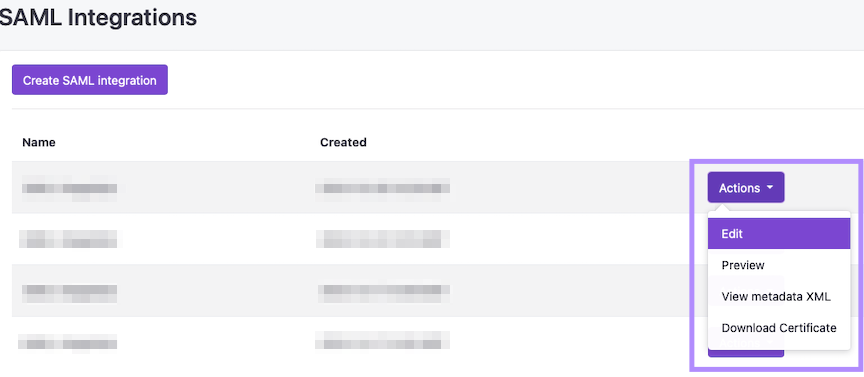
Once you have created your integration, you will be redirected back to the integration dashboard. From there, you should be able to see your new integration listed.
To the right of it, click on the Actions button. You will be presented with a number of different options you can select, depending on your requirements.
2. Slack workspace administration
- Login to Slack as a workspace owner
- Navigate to the workspace administration area
- Click the “Settings” tab
2.1. Configure SAML
Refer to this Slack help center article for more information.
- Click the “configure” button next to the “SAML authentication” option
- Enter the “SAML Endpoint” value provided by Trusona for “SAML SSO URL”
- Enter the “Issuer (IdP Entity ID)” value provided by Trusona for “Identity Provider”
- Enter the value of the “X.509 Certificate” file provided by Trusona for “Public Certificate”
- Expand the “Advanced Options” section
- Uncheck, “Sign AuthnRequest”
- Leave “AuthnContextClassRef” and “Service Provider Issuer” as is
- Uncheck the “Responses Signed” option
- Check the “Assertions Signed” option
- Ensure the following settings are enabled:
- “Update profile each time a user logs in”
- “Allow users to change their email address”
- “Allow users to choose their own display name”
- Choose an option that’s best for your workspace for the “Authentication for your workspace must be used by” section
- In the “Customize” section, enter “Trusona” for the “Sign in Button Label”
- Click “Save Configuration”
2.2. Testing the integration
- After saving the SAML configuration, you will be automatically redirected to Trusona to complete an authentication
2.3. Customizing your Trusona experience
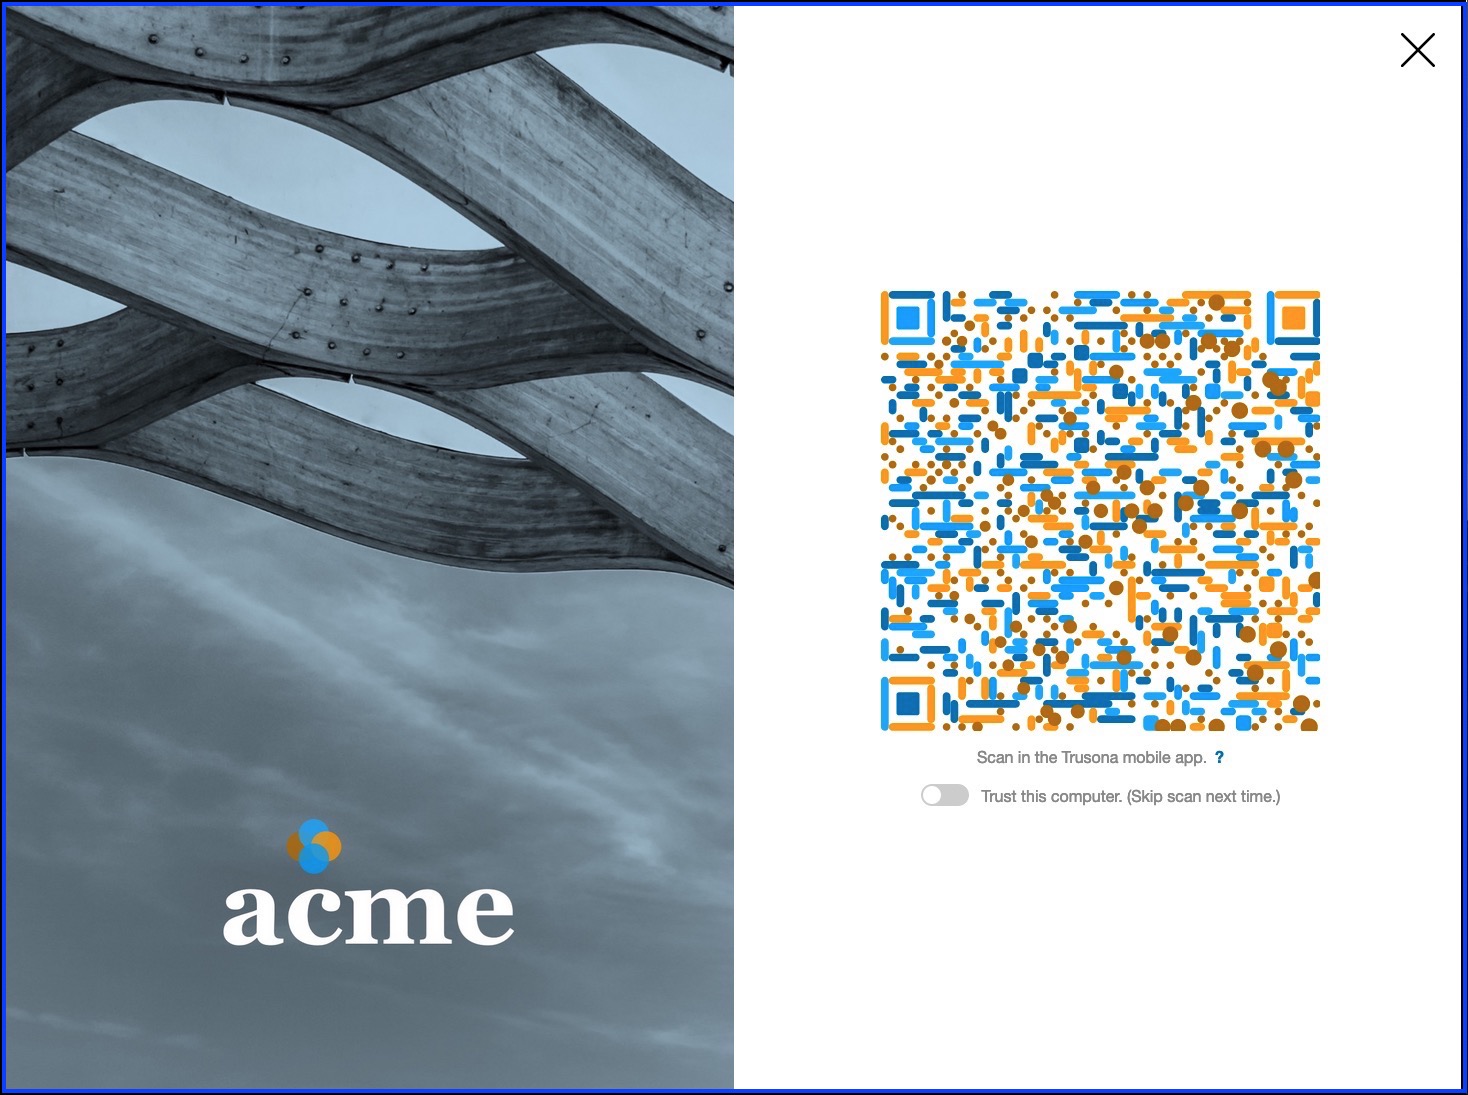
The Trusona Gateway (pictured below) includes default styling that will be familiar to your users using the Trusona App.
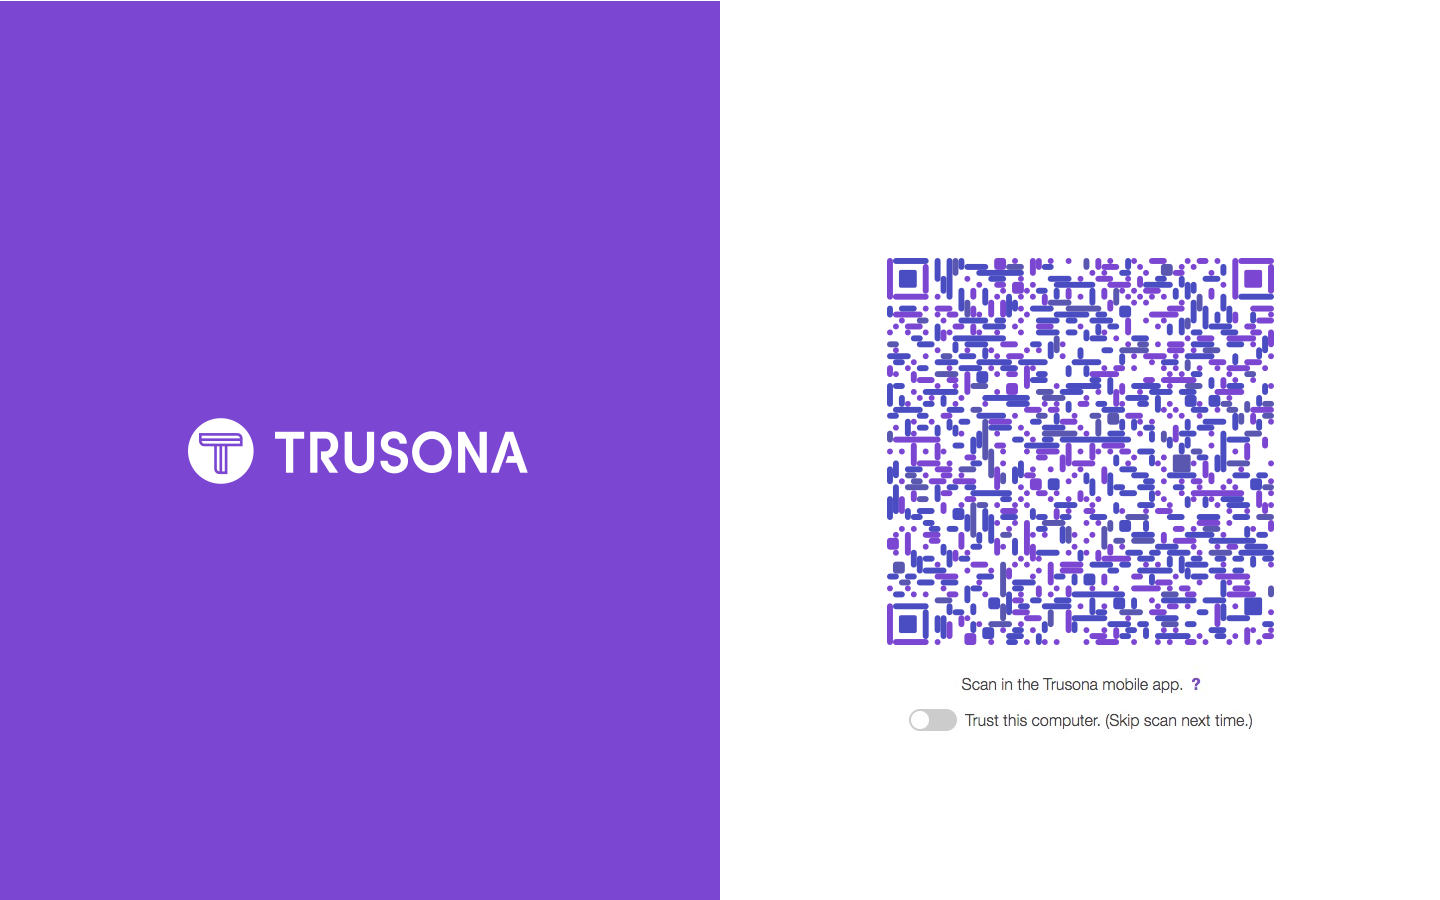
Optionally, it’s possible to provide a custom branded experience for your users including things like:
- Custom secure QR code colors
- Your company logo and colors
In order for Trusona to create your custom gateway you need to provide to Trusona hex values and images for the following:
2.4. Provide images
- Hero image: 1440 x 1800 px
- Logo image: 500 x 500 px
2.5. Provide hex values
- Animated dot color: this is the color dots that animate
- List of QR colors: multiples of the same color will appear more (provide 2 hex values)
- Link color:
- Text color:
- Background color: affects background behind the QR, usually we just do pure white (#FFFFFF)

